Top Aluminium Channel Profiles for Your DIY Projects and Applications?
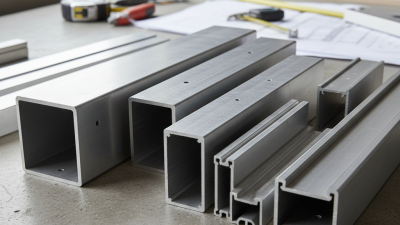
When embarking on DIY projects, choosing the right materials can be daunting. Aluminium channel profiles stand out as versatile options for various applications. Their lightweight nature makes them easy to handle, yet they offer impressive strength for structural support. These profiles come in various shapes and sizes, catering to a broad range of design needs.
The versatility of aluminium channel profiles is truly remarkable. Whether you are building furniture or constructing unique frames, these profiles can adapt to your vision. Think about how an aluminium channel can create a robust base for a shelving unit or act as a sleek trim for artistic installations. The possibilities are endless, yet careful planning is essential.
Remember, not all aluminium channel profiles are created equal. Quality and thickness can vary, influencing your project's final outcome. Sometimes, choices made in haste can lead to suboptimal results, which may require rethinking your design. Reflect on your goals and understand how these profiles can enhance your projects. Take the time to explore how aluminium channel profiles can bring your ideas to life.
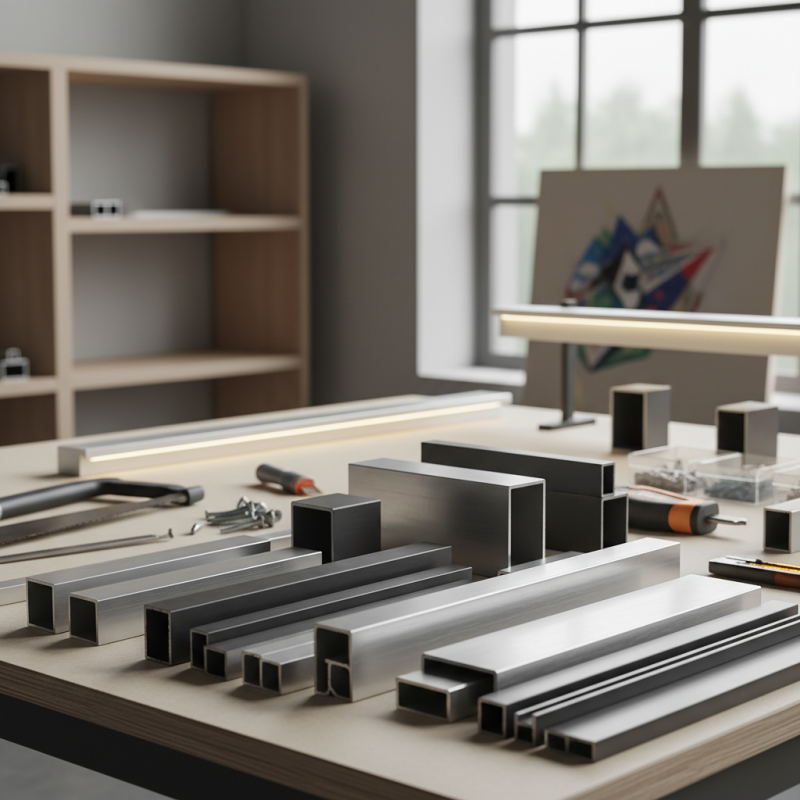
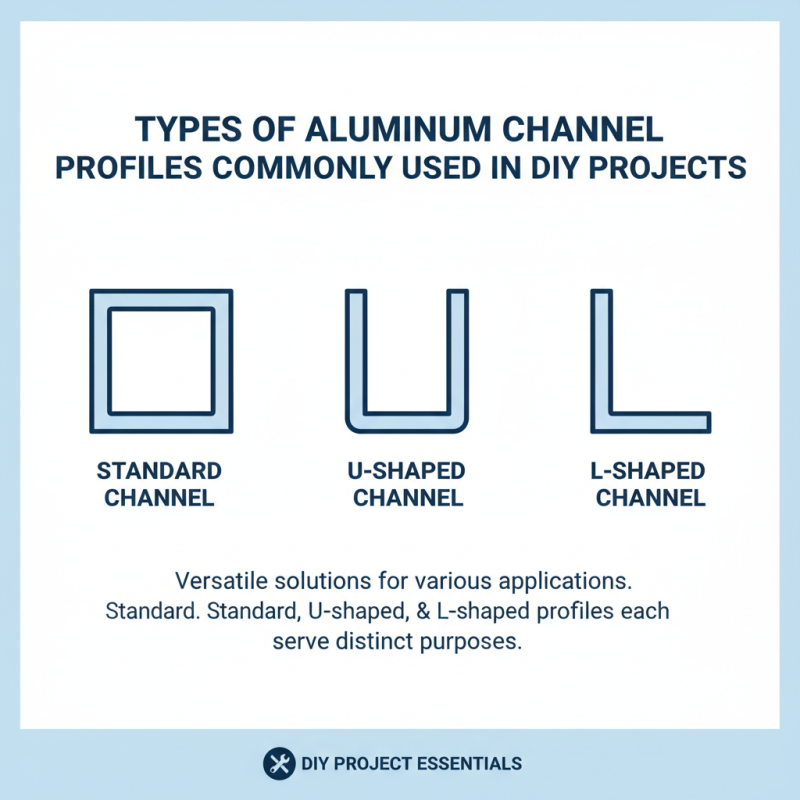
Types of Aluminium Channel Profiles Commonly Used in DIY Projects
When embarking on DIY projects, aluminium channel profiles come in handy. These profiles offer a versatile solution for various applications. Some popular types include standard channels, U-shaped channels, and L-shaped channels. Each serves a distinct purpose.
Standard channels are excellent for framing and structural support. They provide rigidity while being lightweight. U-shaped channels are often used for doors and windows. Their design allows for easy installation. L-shaped channels work well for corner supports and bracing. However, many underestimate the importance of choosing the right type. Using the wrong profile can lead to structural weaknesses.
Aluminium profiles can pose challenges. They can be difficult to cut and manipulate without the proper tools. Moreover, joining profiles may require specific techniques. Many DIYers overlook this when planning projects. Inadequate preparation can result in frustration. It's essential to reflect on the tools and methods required. Ensuring a thorough understanding can enhance the overall project experience.
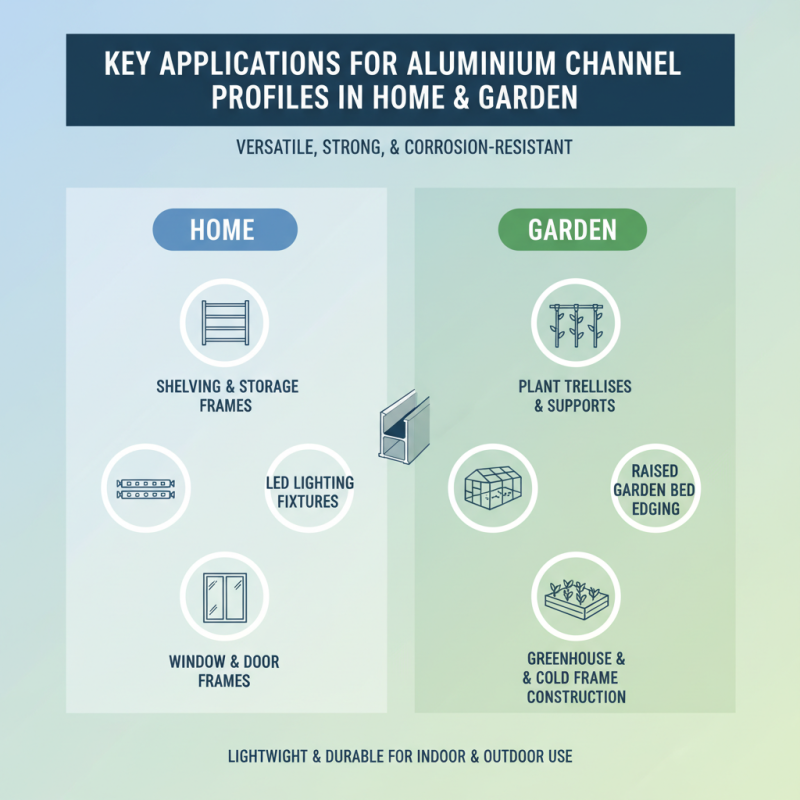
Key Applications for Aluminium Channel Profiles in Home and Garden
Aluminium channel profiles are versatile tools for various home and garden projects. These profiles are strong, lightweight, and resistant to corrosion, making them ideal for both indoor and outdoor use. They can be used to create frames, supports, and even decorative elements in your space.
When working with aluminium channels, always measure twice. A small error in measurement can lead to waste. Proper measurements help ensure that your project fits perfectly in your desired location. You can also use these channels to build raised garden beds. They create sturdy borders that keep soil contained, allowing for healthy plant growth.
Consider using aluminium channels for fencing or trellises as well. They provide durable support for climbing plants in your garden. However, working with aluminium might require some adjustment. It can be tricky to cut and join. Start with a few practice cuts to improve your technique. Remember, patience is key to achieving the best results.
Selecting the Right Aluminium Channel Profile for Your Specific Needs
When selecting an aluminium channel profile, consider your specific needs. Different projects call for different dimensions and weights. For light-duty applications, smaller profiles work well. They are easy to handle and cut. Heavy-duty projects often require wider, thicker channels. Think about the load they'll bear.
Next, think about corrosion resistance. Certain environments can be harsh. If your project is outdoors, choose profiles treated for weather resistance. Surface finishes can also impact durability. Brushed or anodized finishes may extend the life. Remember, aesthetics matter. A polished finish can enhance visual appeal.
Don't forget about installation. Some profiles are easier to join than others. Check if they require special fasteners or tools. If you lack certain skills, simpler profiles might be better. Mistakes during installation can lead to frustration. Reflect on your abilities and how complex your project can be. Balancing form and function is key.
Tools and Techniques for Working with Aluminium Channel Profiles
When working with aluminium channel profiles, the right tools and techniques can make a considerable difference. Tools like saws and drills specifically designed for metal can ensure precision. For instance, a recent industry report highlighted that proper cutting tools can reduce the risk of material waste by up to 25%. This efficiency is crucial for any DIY project where cost effectiveness matters.
Techniques also play a vital role. Using clamps to secure materials can prevent accidents and improve cutting accuracy. It’s essential to measure twice, cut once, as the saying goes. Aligning profiles correctly can be challenging. Minor errors in measurement can lead to significant issues later on.
Adhesives or welding can provide strong joins but require skill. Some find welding daunting, often leading to uneven seams. Experimenting with different methods can yield surprising results. According to industry experts, hands-on practice with these profiles enhances proficiency and builds confidence, but it can also expose areas that need improvement. Engaging in trial and error is part of the learning process.
Tips for Finishing and Installing Aluminium Channel Profiles Effectively
When working with aluminium channel profiles, finishing and installation are key to achieving a professional look. Start by ensuring all surfaces are clean.
Dirt and grease can affect adhesion and appearance. Use a degreaser or rubbing alcohol. After cleaning, sand the edges. This helps remove any sharp edges, making it safer to handle.
For installation, precise measurements are crucial. Double-check all dimensions before cutting.
Miscalculations can lead to wasted materials. When assembling, consider using clamps. They help hold pieces together while you fix them in place.
It’s easy to overlook this, but it ensures alignment.
Be mindful of your tools. A fine-toothed saw will provide smoother cuts. Avoid using tools that could cause rough edges.
After installation, finish with an appropriate coating for added protection. This can prevent corrosion and enhance the aesthetic.
Above all, take your time. Rushing can lead to errors that may affect the overall quality of your project.